|
|
|
The Attributes and History of Dutch Gardens
|
The Dutch garden is distinguished by its
density and efficient use of space. Internationally, any garden
with tulips is also labeled a Dutch Garden. In England, a Dutch garden was a particular type of rectangular garden space, often enclosed within
hedges or walls. This space would
be laid out in a highly cultivated and geometrical fashion,
shaped by dense plantings of colorful flowers, edged with dense and clipped
shrubs or low walls. Often, these gardens contained areas of water and fountains,
which were also laid out in a symmetrical design.
The flower beds and areas
of water would be intersected by geometrical paths, to make it possible
to walk around the garden without damaging any of its features. The Dutch garden, with
its geometry and formality, was in direct opposition to the cottage
garden, which is characterized by grass, winding and asymmetrical paths, and a blurring
of the lines between flowers and grass, and allowing shrubs to flow over into
neighboring flower
beds.
The placement of flowers and shrubs in the
Dutch garden in Holland, however, may be non-linear and informal, though
efficiently making use of space and light. Because the Netherlands is one of the
most densely populated countries, gardens are generally small, and because houses
are placed right next to each other, there is not much light available.
Because of these restrictions, the distinctive style of garden design associated
with the Dutch emerged.
These gardens were small, usually with a fountain in the middle, and
clearly displayed Dutch affinity for all that was thoroughly clean, neat, and pretty,
made with neat patterns around the flower beds. The space being small, there was
often an excessive amount of decorations crammed in wherever possible. Statues, small pavilions,
clipped hedges, all made an attempt to satisfy the Dutch desire for variety in
these little gardens.
The kind of flowers that were cultivated in
Holland had another considerable effect on the extension of gardening. Soon after the end of the sixteenth century the growing of
bulbs was the first interest for botanists, and the trade of Holland was the center
of the flower market.
Trivia:
-In 17th-century Holland, the
newly-propagated tulip was the rage. They were so much in demand, that a handful of
bulbs was worth about $44,000.
-Tulips are edible. During the Dutch famine of 1944 in WWII, people resorted to
eating them.
|
|
The passion for flowering bulbs made a great
difference in Dutch gardens. When the eye grew accustomed
to the many brilliant colors of the flowers, Dutchmen demanded a substitute to serve in those long periods when they had
to wait for their spring flowers to bloom. The multi-colored sparkling globes
that mirrored the garden were not a Dutch invention, but it was
first in Holland that this kind of ornament was conspicuous, together with
little bells, colored pottery, and statues, all in a small space. And
surprisingly, all in keeping with the Dutch belief in everything clean and tidy.
Country houses and gardens sometimes had a canal
that flowed through, sometimes two gardens are separated by a little
meadow, or another garden had arbors that covered the walks. Gardens
and paths were decorated with statues, and along the banks, there are long
beds of flowers, in which the tulips were the focus.
At the larger estates, the main garden was extended behind the house to the side, away from the water-road, according to the French
garden style. The houses,
which are small, are hardly
ever raised on a terrace.
|
Beautiful
Dutch Bulb Gardens
|
Choose your color
scheme - plant in staggered patterns or clumps, not rows. Unless you want an absolutely
formal garden, which is not really the Dutch style. Staggering allows you to stick a perennial in here and there to
cover those bald spots left behind when bulbs are done flowering. I do not like
planting in "rows". I plant my bulbs in clusters of 5-7-9, and
staggered. I know the
bloom dates of the bulbs, so there's a rotating bloom. I solved a lot of the
bare spot problems after blooming by planting ground covers between the flower
clusters. My favorite ground covers for under the flowers are creeping jenny,
Snow-In-Summer, and creeping phlox.
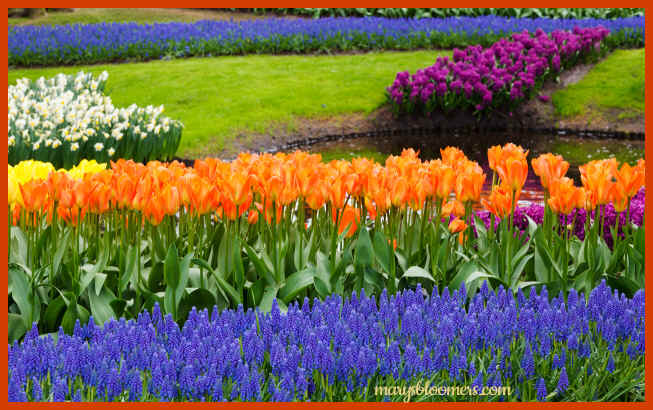
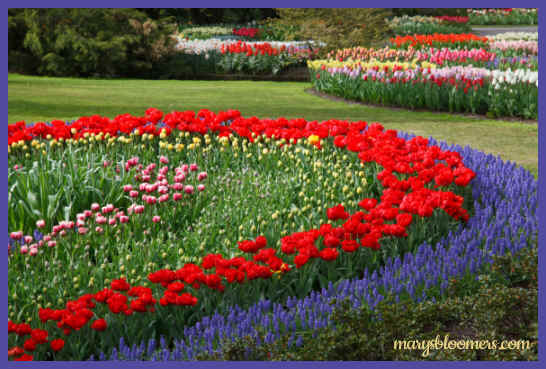
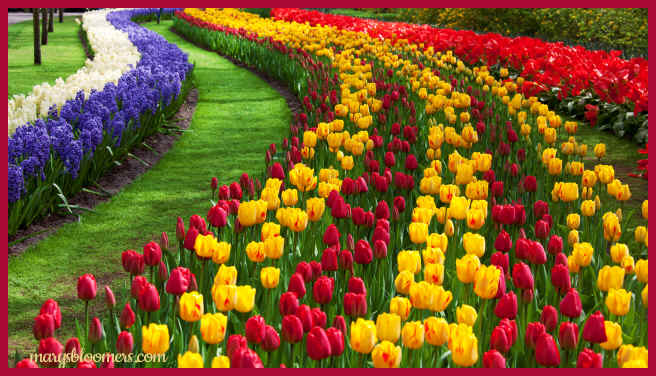
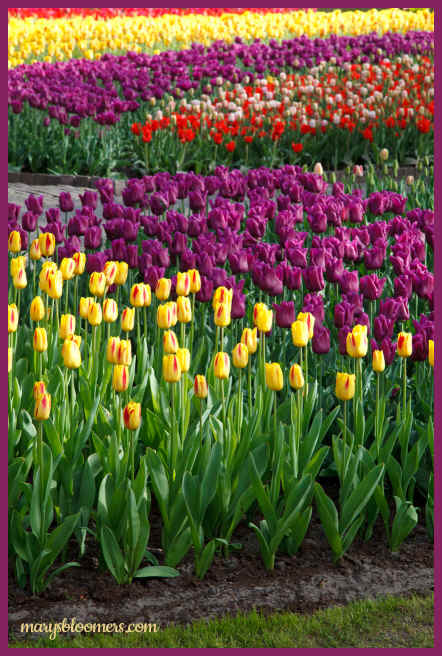
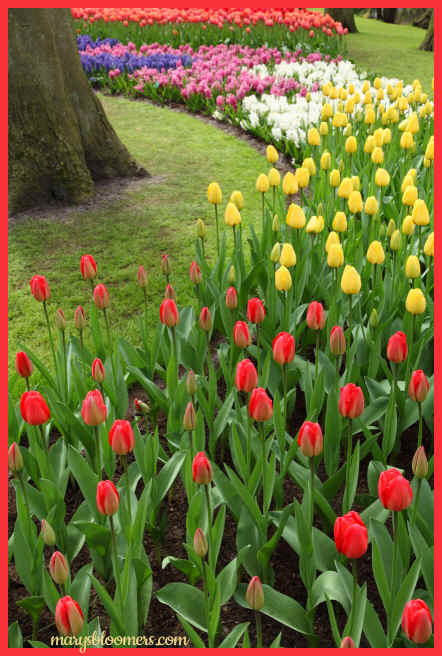
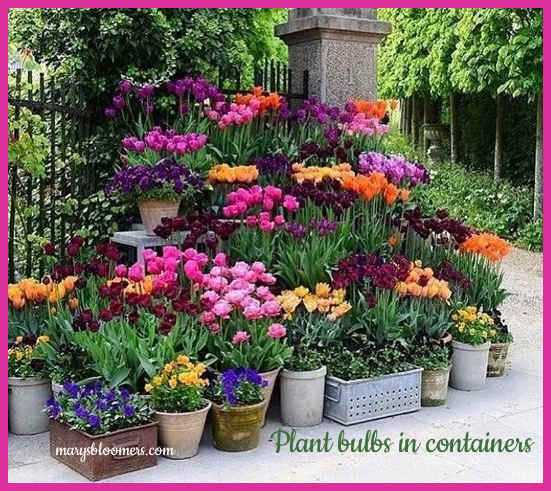
Mass Plantings - For the look of
a traditional Dutch Garden, it
is best to plant your bulbs en masse. Whether you're planting 5 or 5 dozen, they
make the best display when planted together in loose, informal clusters. By
planting bulbs of one variety or color en mass, you will achieve greatest visual
impact by providing uniform color and texture. Avoid planting in a single straight row or in a
single circle around a tree or bush. Bulbs look better when they are planted in
staggered and free-form arrangements. Unless you have a huge, formal landscape,
as shown in the garden photos above.
Shrubs and Trees -
Spring-flowering bulbs can be planted under shrubs or dwarf trees in
the landscape. Don't plant Spring bulbs under evergreen shrubs or large trees,
or they will not have enough light to grow and bloom. Early-blooming bulbs
receive plenty of light because they start growing long before trees
and shrubs start to develop leaves. Some bulbs that perform well under trees and
shrubs include: grape hyacinths, crocus, winter aconite, snowdrops, bluebells
and early tulips and daffodils.
By carefully choosing bulbs to match blooming dates with the bloom of
a shrub, they can provide a beautiful color contrast with early flowering
shrubs like forsythia or flowering quince. They can also be used in
combination with smaller flowering trees like Crabapple, Cherry or
Redbud.
Repeat Shapes and Colors
-Landscapes are more pleasing and come
together well when the same plant or grouping of plants appears in a lot of
spots. In a formal setting, plant in squares,
rectangles or circles. For a more natural or informal look, use ovals,
triangles, kidney shapes or a free-form shape. I like spirals.
Foundation Planting - You
should plant bulbs in a grouping of 12 or more bulbs to add color to a foundation planting. Evergreen shrubs planted in the
foundation planting will provide a nice background for the bulbs. Pay attention
to the foliage color of annuals and perennials, as they too will become a
backdrop for your bulbs.
Grouping Bulbs - With spring flowering bulbs
such as Tulips or Daffodils, plant at least 12 bulbs of one variety in a
grouping. The more bulbs planted of one variety and color, the greater the
impact. I plant in odd numbers, in a circular clump. The small spring bulbs, like crocus, should be planted in
groups of 50 bulbs or more to have impact. Smaller bulbs need to be viewed up
close, so they should be planted along sidewalks, patios or entryways. 5-9 bulbs are
my suggested minimum number of summer bulbs of
the same variety to plant in a grouping.
Border Planting - A border of low-growing
bulbs like Hyacinths or small Daffodils planted around the
edge of a vegetable garden or flower bed adds interest to these areas. A border
of bulbs planted along the edge of the lawn will add a color to the
lawn area. I don't do lawns, so that doesn't apply to
me. I'll edge my vegetable gardens, container and focal points plantings.
Click
the pic to download a Gardens Illustrated
bulb garden border design plan in .pdf format

|
|
Perennial Beds
- Spring
Bulbs can be incorporated in a perennial bed or border to add areas of spring
color. The bulbs will bloom during March, April and May before perennials start
to flower. Locate the bulbs in the flower bed so that the dying foliage will be
hidden when the perennials start to come in. When planning borders, consider the heights and spacing needed by different
plants. Plant groups of bulbs among perennials to help hide the foliage as it
fades.
Slopes -
Slopes in the landscape
are difficult to mow and maintain. Many gardeners use early spring bulbs on steep slopes to add early spring color to the landscape.
Plant Small Spaces
- Plant bulbs of one
color in small spaces in the landscape. One color will have greater impact, and
make the planting space look larger. Mixed colors planted in a small space tend
to make the space look smaller.
Plant large spaces - In large areas of the landscape where you have a lot of
planting space, plant two or three different colors.
Concentrate the bulbs for each color together and do not intermix them. Be sure to select colors that blend together. White flowers can be
used to blend colors together or to brighten dark corners.
Mingling Plants - The
color of spring-flowering bulbs is enhanced when they are planted with other
compatible early flowers. The color of summer-flowering bulbs will be enhanced
when planted with summer flowering perennials and annuals. Extend your spring
bulb display by planting similar-looking bulbs and plants with different bloom times.
Many summer bulbs are tall and the lower part of the plant unattractive after
bloom. Plants like Lilies and Dahlias can be mixed with perennials, annuals or
shrubs to hide the lower stem area.
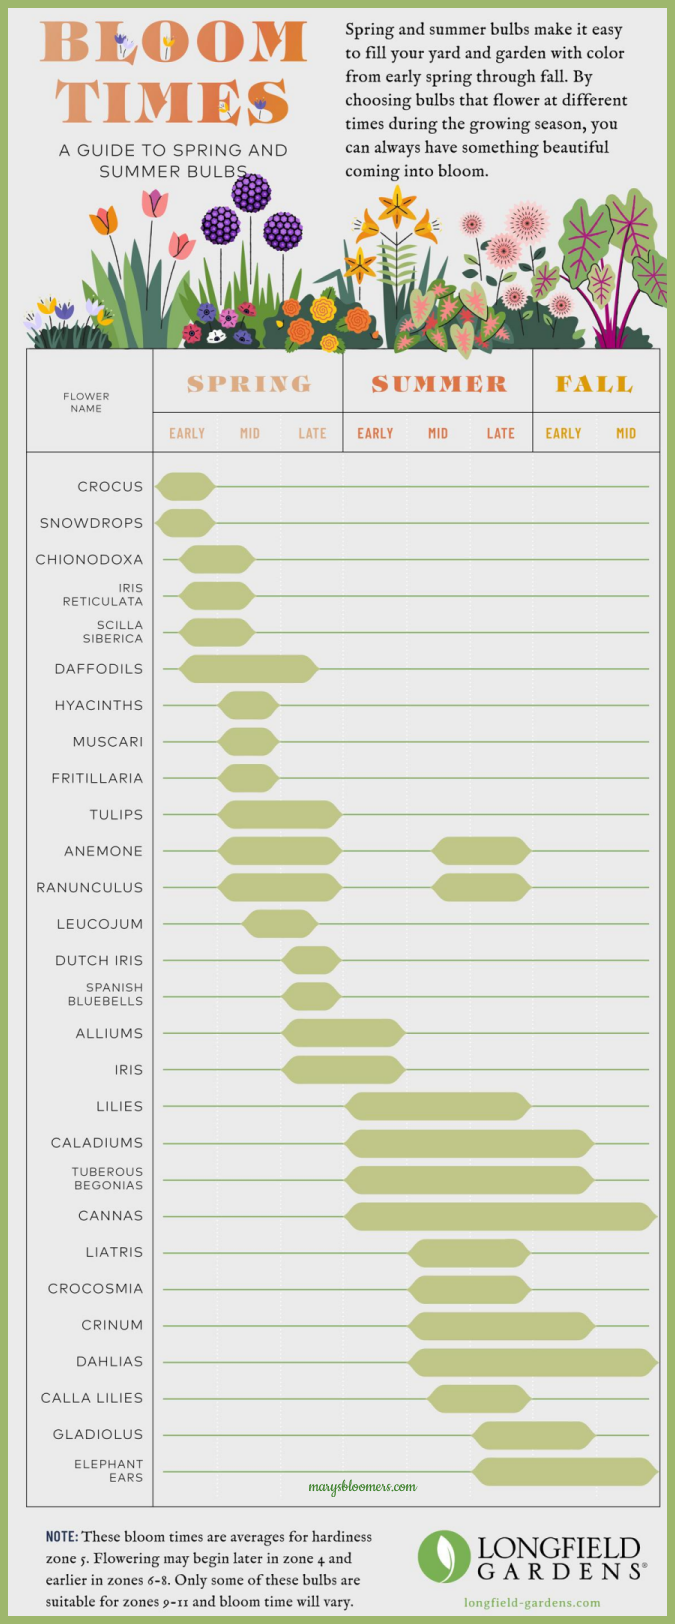
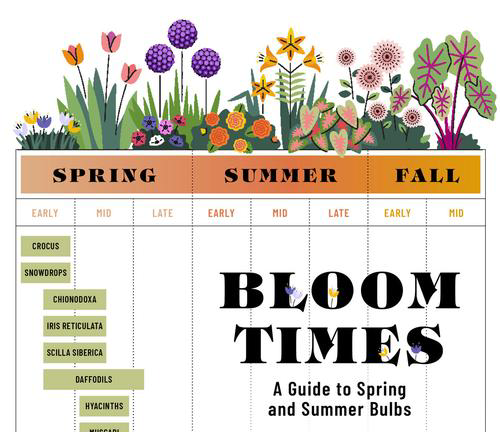
click
the pic
below to view and save
a large version of a bloom time chart for
bulbs
Ground Cover - Some bulbs can be planted
with low-growing ground covers like ajuga, violets, vinca minor or English Ivy.
Just be sure to keep in mind the height relationship between the ground cover
and bulb flower. As a general rule, the ground cover should be no more than half
the height of the bulb flower.
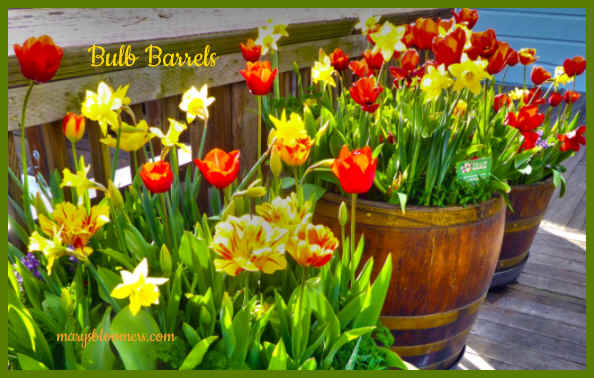
Containers - Both spring and summer bulbs
can be planted in portable containers. If spring bulbs are planted, the
container can be moved to a location out of sight while the foliage matures,
once the bloom time is past. If summer bulbs are used, they will add color all
summer to areas like a patio or a deck. Containers are portable and they
can be moved around. My favorite aspect.
|
*
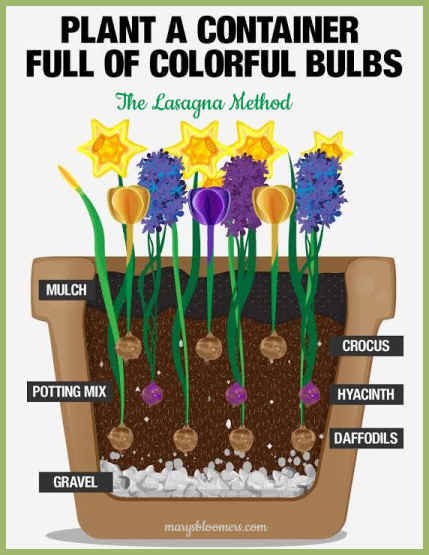 |
Making Lasagna
When selecting your bulbs, consider bloom times, color, height and
texture. If layering in a container, select a large pot that has drainage
holes, or place a few inches of pebbles in the bottom for drainage, and
lay a base of potting soil about four inches deep into the pot. Set in one
layer of bulbs using your largest variety.
Pack the
bulbs fairly close together; they can be nearly touching. Add another
two inches of soil, then the next set of bulbs. Repeat with a third layer.
Fill the pot to the top with potting soil, and water well. You can keep
the pot in your garage until early spring.
The lasagna planting method can also be used directly in the garden. Just
plant the largest bulbs at the depth recommended on their packaging, and
layer smaller bulbs on top.
Lasagna planting allows for a variety of
colors, sizes and textures in a single space. Plant several different flowers with a similar hue and
varying bloom times for a compact, long-lasting garden display.
|
 |
Common flowers found in the Dutch garden
Tulips
Daffodils
Hyacinths
Anemones
Calla Lily
Roses
Snowdrops
Crocus
Bulbs That Bloom In The Shade
Snowdrops
Crocus
Scilla
Chionodoxa
Daffodils
Tulips
Grape hyacinths
Fritillaria
Anemone
Leucojum
Lily of the valley
Camassia |
Click the
pics below to download these free
bulb garden design plans in
.pdf format
Swap out colors that you wish to highlight in your palette by choosing bulbs
with the same attributes.
**Idea: You can plan a spring and summer Monet Garden, using bulbs in shades of pinks,
blues, and purples, along with yellow, orange and white, rather than the bulb
colors suggested.
Order your bulbs for these designs from your favorite
reputable neighborhood or online nursery.
Multiply the design plan for a larger garden bed or landscape.
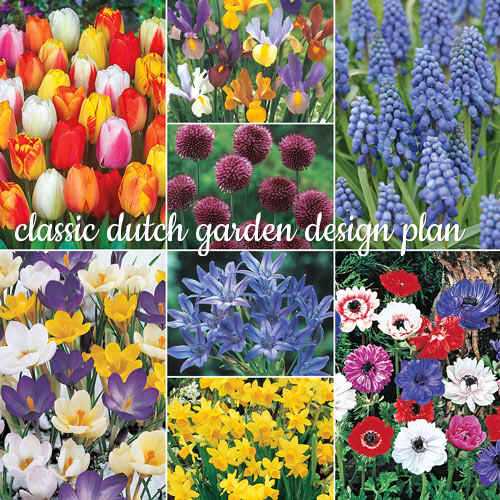
|
Zones 4-10
Classic Dutch garden bed
Easy to plant and grow in any sunny to partially-shady spot.
 |
Zone 3-10
A Summer-Long Blooming Border

|
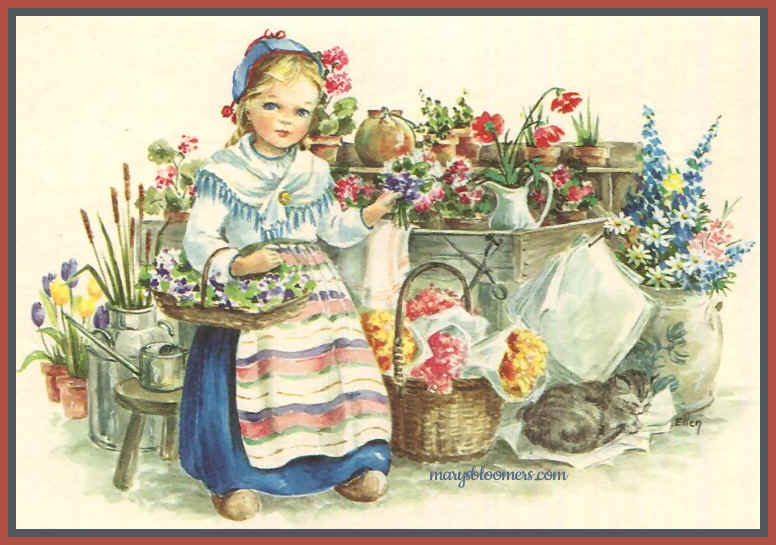
If
you love the vintage artwork on this page, visit
Vintage
Garden Graphics Collections-->
Detailed
Site Directory-->
Sources for this article:
wikipedia
Longfield Gardens
Breck's Bulbs
Michigan Bulbs
Gardens Illustrated
Tractor Supply Co.
Quick
Links

Content, graphics and design ©2020 marysbloomers.com/eyecandee.com
All rights reserved
This
site uses Watermarkly Software

|